So here came my expanded idea of Felt Spring Eggs that you match to color as well as to the number of buttons on each egg. Which will make a good counting/matching/memory game for you and the little one for many years to come!
**Please note this is a Parent Project. Since it involves cutting, hot glue gun/sewing!
It can be modifed to work with an older child pre-k see notes below.
Supplies Needed:
10 Spring Colored Felt 5 should be the same darker color.
(can be found at any craft store, usually 25 cents each)
105 Spring Colored Buttons (bag of buttons can be found at walmart or any craft store $6)
Scissors
Hot Glue Gun or Needle or thread (depends on your preference)
One piece of paper for Egg Cut Out
Ribbon/puffy paint (optional)
Marker
Aprox time for project: 3 hours or less
On your Piece of Paper Draw an egg with a marker. Please remember it has to be big enough to hold 10 buttons. Then Cut the paper egg.
Use the paper egg as a template for cutting out your felt eggs. Fold the felt in half and cut out 20 eggs. Use the darker color as the underside of your eggs. So when flipped over you cant tell them apart if using various spring colors.
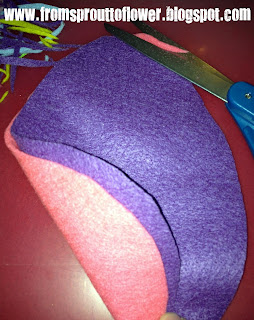
Place the spring egg felt front with the darker spring egg felt back and trim so they match. We used different spring colors and purple for the back.
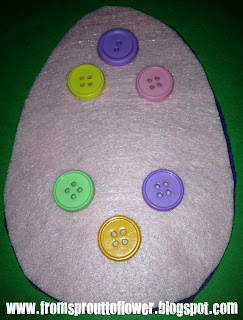
Sew or hot glue gun a button on each half for corresponding number. ex. 10 buttons on one half and 10 buttons on bottom half to match!
Make sure you leave space in the middle to place ribbons/puffy paint and also to cut in half.
You can embellish them if you would like with matching different color ribbons on the bottom or with puffy paint. Its all up to you and your time!
We used ribbon, glue the underside, then glue the rest of the ribbon and press on it to make sure it sticks.
Make sure to leave space in between ribbon or puffy paint to cut in half.
Then glue the remainder of the ribbon and tuck it under.
Cut the eggs in half.
Separate light and dark color bottom egg halves. Apply hot glue on the light color bottom egg half.
Press the dark color bottom egg half onto the light color bottom egg half so the glue will hold.
Now trim the edges make sure the side with the button color felt can not be seen if your using different colors. This way when playing a matching memory game the child cant see the colors.
Seperate light and dark color top egg halves. Apply hot glue on the light color top egg half.
Press the dark color egg top egg half onto the light color top egg half so the glue will hold.
Now trim the edges make sure the side the button color felt can not be seen if your using different colors like pictured here.
What your finished Spring Egg front side looks like!
What your finished Spring Egg front and back side look like!
Once you've done the 10 eggs your done!
Make sure you enjoy using these with your child!
These eggs can be used in many ways:
-Counting
-Matching
-Memory Game
-Colors
This project can be modified to use any type of object like flower, pumpkin, tree, depending on the season! We used the eggs idea since its springtime!
*Now this project can be modified to work with a preschooler to kindergartner so they can help you make it. Instead of needle and thread or Hot glue gun, replace that with Tacky craft glue so they can help you glue the buttons on. Please be aware that with tacky glue you will need time for the buttons on the eggs to dry before you can cut them in half and then glue them together.
*Please watch your child play with these eggs, since they do involve buttons! Buttons can be a choking hazard if they fall off, are pulled, or not glued enough!


Very cook Cynthia!! I will have to see about doing this for my BFF's little girl!!
ReplyDelete